Technical Traumas And A New Look Blog

It has been a very tense week!

The reason?

Making the move to WordPress.org!

All you need to do is add your e-mail address to the sign up box on the left to keep receiving my updates to your inbox.

It has been nearly a year since I started blogging…and I am loving it…watching my stats and subscribers grow slowly but steadily, documenting things as they change in my life, and sharing some of my research and passions.

And then came that mystery Facebook referrer, my page views literally increased by 200% or something crazy…and I was kicking myself for not having a blog that made it super simple to click through to related posts, or follow me on Facebook or Twitter.

So I did it, I made the move.  It’s the same web address, but you won’t receive e-mail updates from me unless you enter an e-mail address in the sign up box on the right hand side, but I will still be there in your reader.

Please join me again…And please bear with me while my page looks less than dazzling while I recover from all of the technical traumas!!

Wild And Wisdom xx

7 Natural Cold Remedies For The Whole Family.

Colorful Baby Toy SetBeing pregnant or breastfeeding continuously, for over two years, I have had to defeat more than a couple of seasonal sniffles the natural way.  Having a cold isn’t the end of the world, but it’s unpleasant, sleeping, breathing, coughing and spluttering.

I wouldn’t take a cold or flu remedy while breastfeeding, and I definitely wouldn’t choose to give the little guy anything either.

So when I saw the little guy with a runny nose, and a total aversion to having it wiped with a Kleenex,  I had to employ underhand tactics to help him out!

Here are a few tips, a round up of some natural remedies for the whole family as an alternative to those over the counter remedies which contain a cocktail of expectorants (to bring up phlegm), decongestants (to unblock your nose) and pain relief…eek!.

Fluids

Plenty of water.  Occasionally add some honey, manuka is my favourite, to soothe a sore throat.  Don’t add lemon, it is too harsh on a sore throat, and no brandy for the little ones!!  Honey is Ok after 12 months old, it has soothing and antibacterial properties for a sore and tickly throat,

Chicken soup

It’s not just an old wives tale.  The American Journal of Therapeutics showed that a compound found in chicken soup – carnosine – can help the body’s immune system to fight the early stages of flu.  Chicken soup contains a whole host of other goodies, organosulfides found in onions and garlic, and carotenoids found in carrots are just a few other nutrients that are great for boosting the immune system.

Steam

Steam is the most natural way to ease congestion, you could buy a humidifier, but there are many other ways to get that steam circulating.  A pan of water simmering on the stove (stay in attendance with this one!), a wet flannel or face cloth on a warm radiator, running a hot shower or bath and relaxing in the steamy environment.

Rest

Slow down and give you body the chance to use its strength on recovery, keep warm and get plenty of rest or sleep to let your immune system put up a good fight.

Natural oils

Try a few drops of a menthol oil, eucalyptus and clove oil is a good mix.   We use Olbas for children, a few drops on a damp cloth in the bedroom at nigh, it contais a mix of cajuput oil, clove oil, eucalyptus oil, juniper Oil, levomenthol, methyl salicylate  and mint oil at a concentration suitable from 3 months old.

Raise your head at night

For adults, an extra pillow under your head, for kids, a couple of books under the legs of the cot or bed to raise the head a little higher will help the nose clear effectively instead of blocking the nasal passages.

Remove irritants

A last resort, remove any perfumes, air fresheners, scented candles or anything that might be adding to nasal irritation.

Your remedies…

So theses are some of the things we practise at home. I have read about saline nasal sprays or irrigation for adults and kids, but its not my thing!!  I also can’t bring myself to use one of those nasal aspirators on the little guy, I can’t imagine the little guy cooperating with either!!

What are your favourite home remedies to help with colds and runny noses that work for the whole family..please comment and let me know?

How To Make A Button snake. Dressing Practice For Toddlers.

20131118-153417.jpg

One of the core principals of the Montessori prepared environment is beauty.  Not in a grandiose manner, but in a natural, tranquil, enticing and ordered way.

Learning materials should be equally beautiful, carefully crafted and presented.

It is for this reason that I seem to spend a disproportionate amount of time creating materials relative to the amount of time he will probably spend on them.  Ok, I probably make things that are a little advanced, but I figure over time, these things will live a long, well loved life, that will make the hours of crafting worth while.

This button snake is a perfect example…it could be a much simpler task than I created for myself, but I wanted a snake that would look good and stand the test of time, in beautiful rich and tactile colours.

The idea of the button snake is to help with practical dressing skills…self-dressing coordination, concentration and independence from about 2 years of age.

The original inspiration was a much simpler version, made in felt.  The squares of felt simply need cutting to size, with a slit in the centre…have a look at Counting Coconuts version here.

I had this old fabric sample book which was going spare, the rich velvety colours were too tempting and the rectangular samples folded into perfect squares…no cutting needed!!.

20131118-153446.jpg

Here’s how to make one…

Start with your fabrics of choice, my squares were just over 10cm x 10cm.  You will need 20 pieces of fabric to make ten squares, don’t forget to allow for the seams, so your squares should be a couple of cm larger than you want them to end up.

With the patterned sides together, stitch all the way around, leaving a gap of approx 5cm.

20131118-153434.jpg

Turn the squares the right way, through the opening.

Use a chopstick to get into the corners and achieve nice crisp squares.

Press squares flat.

Close the seams with a blind (ladder) hand stitch.

20131118-153425.jpg

Set up your sewing machine for buttonholes.  Stitch a central button hole onto each square according to manufacturers instructions.  (Definitely practise this on a scrap of material first, it took several attempts to get this technique perfect and make sure your button fits through the hole!)

Use a craft knife or stitch-ripper to open up the buttonhole.

Tips:  I chose a contrasting thread for the buttonhole, to highlight the opening.  I also made the largest size hole available on the sewing machine, I plan to start with a large button, and sew up the hole for use with a smaller button as he masters this one!

20131118-153455.jpg

Finally, take a length of ribbon and securely attach two buttons, one at each end.  I tried a couple of techniques as you can see from the buttons in the picture, just use plenty of stitches as this is going to get pulled about…a lot!

This one could be quite frustrating for little fingers, so take plenty of time demonstrating how to thread and un-thread the buttons at the beginning.

20131118-153407.jpg

I’m linking up at Montessori Monday, check it out for lots of other great inspirations.

Montessori Monday

Sensory Rice Tray…How To Use Colouful Rice With Toddlers

20131115-101826.jpg

This green rice has been hanging around the kitchen for a week.  I was desperate to colour it up, but I have been unsure how best to use it with the little guy…so it has been sat in a box looking very green and sorry for itself!

Part of the problem I guess, was knowing the mess that would follow after just a few minutes of play, I couldn’t figure out a way that he would play with the rice, instead of just launching it skywards immediately.

Dry rice is brilliant at waking up the skin receptors on the hands, it is great for those who love tactile play as well as those who don’t (they can use spoons and tools), and you can scent it to calm down an energetic toddler (lavender) or to perk up a sleepy one (peppermint).  I really like the idea of using a scented rice as an introductory activity to get the brain in the zone for a task that might need a higher level of concentration.  Then there are also the fine motor skills that are always under development, grasping, reaching, manipulating with the hands and fingers in preparation for handwriting , self dressing and feeding.

So today I took the plunge.  I shook out a new shower curtain to cover the floor and I sat back as he played like a pro, for near 30 minutes.

20131115-101842.jpg

Colouring rice can be as simple as adding food colouring to a box or bag of rice before shaking it up until everything is covered evenly.  Some ‘recipes’ call for hand sanitizer and microwaves, but I like to keep things as straightforward as possible…

20131115-101812.jpg

Make your colourful rice…

Add rice to a bowl, bag or box.

Add a drizzle of food colouring (add more colour until you reach the desired vibrancy.)

Shake or stir until all of the rice is evenly coloured.

Spread on a tray and leave to dry out overnight.

20131115-101819.jpg

Then it is time to make up your sensory tray…

I chose a deep tray, and kept the activity simple.  I placed a spoon and a bowl inside the tray, and added a bagful of pompoms for a totally different texture…and that was it.

He spooned the rice into the bowl, he grabbed handfuls of rice and sprinkled it about, he tried to bury the pompoms, he was totally engrossed…for 25 minutes…

20131115-101834.jpg

…and then he did this!

20131115-101849.jpg

…but I think half an hour of enjoyment was worth a bit of spilled rice!!!

You can take the dry rice to so many different levels for different ages.  You can use it for mark making, or for themed sensory trays like this Christmas one, or imaginative play like this farm themed idea, just by changing around the objects  and toys that you place in the tray.

Having A Moment Of Milk Doubt? How Often To Nurse Past 1 Year Old.

20131114-103126.jpg

Every so often I have a breast milk fuelled wobble.

I start thinking about pouring the little guy a couple of cups of milk a day. I worry that his calcium intake is not sufficient for his bone development. Should I be supplementing with vitamin drops, am I really doing the best thing letting him feed several times daily still.

At times like this, I need to find reassurance that I am still doing the right thing for my guy, that I am not depriving him of any vital nourishment, and that in fact he is getting the fullest of fattiest milk to develop his brain and the most bioavailable source of vitamins and minerals possible.

There isn’t an enormous amount of information out there about extended breastfeeding, even less of it is properly researched…so it took some time to find rthe reassurance I was seeking.

You can read some of my previous research here, I looked into exactly why breast milk is so good past one year…

But how much should a toddler be drinking?

There is no official minimum intake guideline for milk. Form what I managed to round up from various sources, it seems like between 1-3 years of age, 15-18 oz of cows milk is a good amount (400-500ml). But how does that translate to the invisible measures of breast milk.

According to KellyMom, as long as your toddler is nursing at least 3-4 times a day then there is no need add cups of cows milk.

The reasoning…milk-splash.jpg

Cows milk is just a convenience, a convenient source of calcium, vitamin D and fat.

Check out my detailed research here to see exactly why breast milk is more than adequate, but just quickly, it is super full fat, with high levels of vitamins and minerals designed specifically to be easily absorbed by the human child.

So if your child is nursing regularly still, then go with it, combined with the varied diet that he will be getting, then all should be good in the brain and bone!!

If you want the figures in detail, the NHS website recommends the following as a guideline daily intake, but it can be averaged out over a week:

Ages 1 to 3 years: 700 milligrams (mg) per day
Ages 4 to 8 years: 1,000 mg per day

Here are some serving recommendations:

  • 1/4 cup raw tofu prepared with calcium sulphate: 217 mg (The calcium content of tofu varies, depending on how it’s processed. Check the label.)
  • 1/2 cup plain yoghurt: 207 mg
  • 1 tablespoon blackstrap molasses: 172 mg
  • 1/2 cup fruit yoghurt: 122 to 192 mg
  • 1/2 cup calcium-fortified orange juice: 133 to 250 mg
  • 1/4 cup ricotta cheese: 167 mg
  • 1/2 cup milk: 150 mg
  • 1/2 cup chocolate milk: 144 mg
  • 1/2 ounce Swiss cheese: 112 mg
  • 1/2 cup vanilla frozen yoghurt, soft-serve: 102 mg
  • 1/2 ounce cheddar cheese: 102 mg
  • 1 slice whole grain bread: 24 mg
  • 1/2 ounce mozzarella cheese: 103 mg
  • 1/4 cup collard greens: 66 mg
  • 1/4 cup homemade pudding (from mix or scratch): 76 mg
  • 1 tablespoon tahini (sesame seed butter): 64 mg
  • 1/4 cup turnip greens: 50 mg
  • 1/4 cup cooked spinach: 60 mg
  • 1/2 cup calcium-fortified cereal (ready to eat): 51 mg
  • 1/2 cup calcium-fortified soy beverage: 40 to 250 mg


The Little Helper Kitchen Tower Unveiled.

20131106-103601.jpg

So here it is…the kitchen helper in its almost final incarnation!

After a total of EIGHT coats of primer, paint and varnish, it finally stands proudly in the kitchen.

The little guy knew straight away how to climb the ladder at the side, and once up on his shelf, he started clapping his hands…congratulating himself, or possibly me, on our achievements!

Then, with his hands on the top bar he started shaking the whole thing a bit too vigorously! Now I can see why those anti tip feet are pretty vital to the construction.  They are all put together, just not painted, I must get them fitted ASAP.

Something that the plan didn’t incorporate, was any kind of safety or support enclosing the upper part of the tower. The Idea of the large opening is that your little helper can find their own way up onto the platform, climbing in though the nice big space.  But once inside, my guy has a tendency to forget he is up high on his new platform.  I need to come up with a removable idea, just to keep him safe while he is learning about his new space.  Any ideas??

For now I will keep a close eye on him, keep the kitchen door shut when I am not in there, and get the anti-tip feet painted and fitted.

20131106-111343.jpg

Under construction.

The idea is both common sense and Montessori inspired, helping your little person to help themselves.  I hope that he can join in with the family at the counter top, he can start practising his chopping, mixing, washing and drying with the adults so that he can get a little bit more involved in everyday activities.

For now he will just be eating everything in his reach…and making a whole lot of soapy mess!

20131106-111352.jpg

Breakfast at the counter.

20131108-110734.jpg

Making a soapy mess!

20131108-111534.jpg

Banana attack.

If you fancy a go at making your own kitchen helper tower, have a look at the plans on the AnaWhite website.  Her plans are really detailed down to the complete cut list for your wood.  She has some great ideas and hundreds of other plans varying in difficulty.  I think I might have a go at making his little bed next!!

Has anyone else made anything like this before, how has it worked out in your kitchen?  Let me know

Extra Sensory Scented Play Dough.

20131103-163759.jpg

Home made play dough is such a simple pleasure.  Grown ups and kids alike can’t help but give it a squidge.  It is quick and easy to make, and you can vary it in endless ways.

Today, I thought I would treat the little guy to a new batch of the squishy sensory stuff as we were a little housebound.

To make things a bit more interesting, and to stimulate the senses, this batch was a kind of aromatherapy dough.  After learning about importance of sensorial activities  in a Montessori setting, this seemed like an ideal variation on the usual play dough theme.

20131103-200930.jpg

I used the recipe below to make up a nice big batch of dough which I split in half.  I coloured one a light green and added a few drops of peppermint oil.  To the other half, a teaspoon of ground cinnamon and a little red colouring.  Mint creams and cookie dough, it would be a miracle if he didn’t devour the lot!!

20131103-163813.jpg

Not having had much luck with cookie cutters and rolling pins in the past, I decided to bring some contrasting textures and colours into the mix.  Some natural, some man made, the variety kept him interested for so much longer than I had anticipated.

Play dough is a great tool for fine motor development.  On its own, each squash, squeeze, poke and prod is developing a skill.  The extra elements help to multiply the possibilities of exploration and investigation.  The change in pressure required to poke in a spaghetti stick is different to the pressure required to press in a flat star shape. A bowl of rice behaves differently in little hands to a ball of dough.  Try out the recipe below, and add anything you can find to change up the experience.

20131103-163825.jpg

2 cups plain flour
1/2 cup salt
2 teaspoons cream of tartar
2 tablespoons oil
1.5 cups boiling water

Mix the flour, salt, cream of tartar and oil together in a bowl.

Add the boiling water and combine with a spoon until a dough forms, add more water slowly if needed to bring all the ingredients together.

Turn the dough out onto a surface and once cool enough to handle, begin to knead for a few minutes to create a smooth bouncy dough.

Divide the dough and colour or scent  using some of the following ideas…

Cinnamon
Ginger
Cocoa
Essential oils, peppermint, orange, lavender…
Rosemary
Ground cloves/nutmeg/mixed spice
Turmeric
Food colouring
Food flavouring

Then raid the cupboards for some textures…

Dried pasta
Dried beans
Dried rice
Straws
Pebbles
Leaves
Paper clips
Glitter
Beads
Feathers
Cookie cutters

20131103-163751.jpg

An Apple A Day, Growth Vs Nutrition.

20131114-103413.jpgWas the first year of your baby’s life blighted by that WHO growth chart. Each weigh in, exciting, but tinged with just a little fear…failure to thrive, dropping off the curve, supplementing suggestions, early weaning…

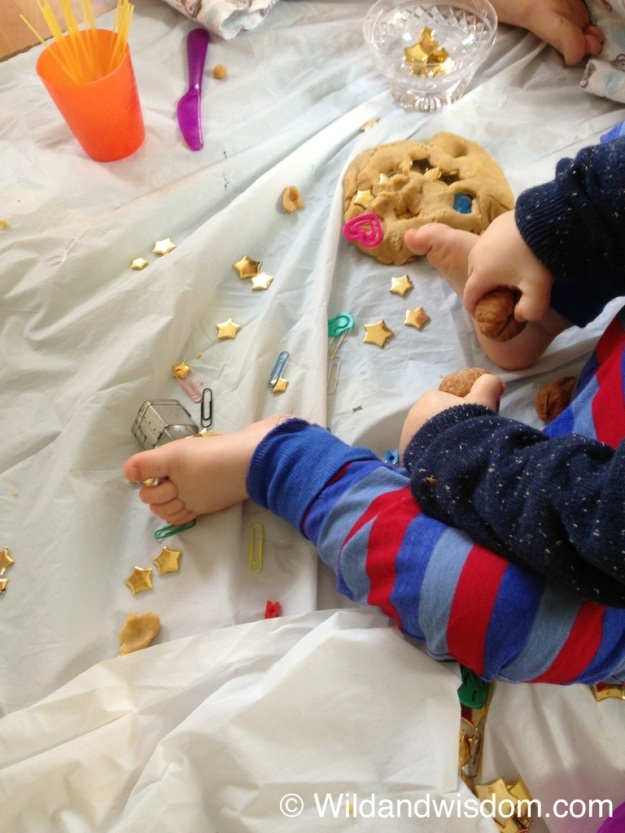
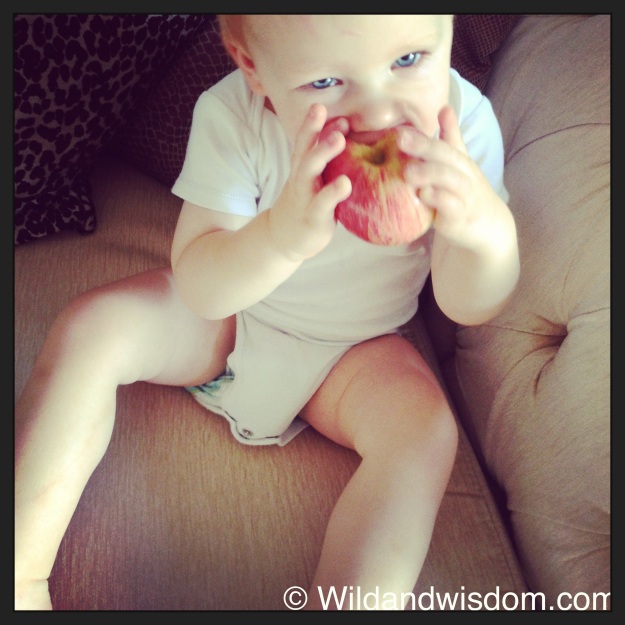
Then the solids start, and the mission to bulk up continues.

Food becomes such a focus, but is it for the right reasons?

There are many reasons why a healthy, varied and fun diet is so important in those first months and years…but only at the bottom of my list of reasons will you find the growth chart.

Here are a few of the reasons why I try to focus on variety and enjoyment of food, rather than pure old weight gain.

Variety is the spice of life…

It is believed that the taste for flavour begins in the womb, literally, by flavouring the amniotic fluid! What you eat in pregnancy supposedly going on to affect you baby’s tastes as the grow up. The idea continues with breast milk, not only a constantly evolving source of nutrition but of changing flavour too. It is another way of potentially influencing tiny taste buds and preparing them for a variety of foods.

So the idea continues from birth to 12 months. This is a time when baby is most receptive to new tastes and textures, the theory being that exposing them to as many flavours and foods as possible in these early months means that they will continue with all of these recognisable foods and hopefully be as adventurous going forward in life.

Iron deficiency

Quite a major reason for a varied diet, particularly in a breast fed child, is the lack of iron in breast milk. Around six months when the digestive system is fully formed (please read my article on the virgin gut) and baby’s reserves of iron are all but gone, it is important to introduce some good sources of iron like beans, peas, lentils, broccoli, green leafy vegetables and dried fruit. Knowing you need to incorporate such specific foods can make you quite creative, my guy loved this spinach and lentil dahl for an iron boost and a more exotic alternative to broccoli!!

Strong skeleton, strong mind…

The adult skeleton normally contains 206 bones.  Babies on the other hand have a different mix of over 300 different bones and cartilage parts. One you probably know about, the cranium, start off as three separate plates which shift and move to allow for passage of the baby’s head through the birth canal.  As the baby grows, these plates fuse into one cranium, that soft fontanelle disappears.

All bones start off as cartilage, but many are still cartilage at the time of birth. Cartilage turns into bone over time through a process called ossification.

Calcium is obviously the big factor in bone development.  A diet rich in calcium is vital for your child.  But bones are a made up of more than just calcium…collagen water, phosphorus, magnesium, and other minerals are all found in bone…so they are all as important as calcium in making bone!

Vitamin C from citrus fruits, tomatoes, peppers, and other fruits and vegetables is essential for making collagen, the connective tissue that minerals cling to when bone is formed.

Vitamin K is thought to stimulate bone formation. It is found mainly in dark leafy greens like kale and spinach, but is also available in beans, soy, and some fruits and vegetables.

Potassium decreases the loss of calcium from the body and increases the rate of bone building. Oranges, bananas, potatoes, and many other fruits, vegetables, and beans are all rich sources of potassium.

Magnesium, like calcium, is an important bone mineral. Studies have shown higher magnesium intakes to be associated with stronger bones. “Beans and greens”—legumes and green leafy vegetables—are excellent sources of magnesium.

Fruits and vegetables are also important for what they don’t do. Some foods—especially cheeses, meats, fish, and some grains—make the blood more acidic when digested and metabolized. These foods add to the body’s “acid load.” When this happens, bone minerals, especially calcium, are often pulled from the bones to neutralize these acids.  Diets high in fruits and vegetables actually tip the acid-base scales in the opposite direction and make it easier for bones to hold onto their calcium. (Source: PCRM)

So variety really is more important than quantity?

When you understand the importance of developing good lifelong eating habits and growing bones and growing every other element of a child’s body, it becomes clear that pure weight gain is just a by-product of all of this.

Were you a slave to the growth chart, were you terrified of dropping down a percentile??  Do you think less importance should be placed on that growth chart, or do you think it is an important indication of a healthy child.  Please comment to let me know your thoughts.

Sources

http://pcrm.org/health/health-topics/parents-guide-to-building-better-bones

http://www.niams.nih.gov/Health_info/Bone/Bone_Health/Juvenile/default.asp

My Own Kitchen Helper

https://i0.wp.com/ana-white.com/sites/default/files/helping-tower-kitchen-learn.jpg

Pinterest is such an inspiring platform, from toddler activities to hair-do ideas, home crafting, cake baking and room decorating, one pin leads you on a journey of discovery to as many ideas as your brain can handle. I am a little hooked!

While I was searching for montessori style practical life ideas, I spotted something in the background of one kitchen. It was a wooden step stool on a grand scale, like a personal kiddie castle, enclosed on all sides and perfect for raising any little guy to task alongside you in safety in the kitchen.

After a little Googling, I found the exact stepping stool in question.

The The Learning Tower by Little Partners.

At £100 ($200) it seemed a little expensive, maybe there was a more reasonably priced alternative.

…A little more Googling and I realised it was a fairly unique product.  A few other products, like the FunPod by Little Helper, the Guidecraft Kitchen Helper,  were almost as expensive as the Learning Tower, but in my opinion, not terribly attractive.

But I wanted one now, should I buy it?

Of course not…

Not when there is MDF in the world!

DIY isn’t my strong point, I like to think it is, but it is a bit like baking, I try really hard and the results never reflect my efforts. But I am determined to make this work, the wood is cut, it is laid out ready for assembly, I am now just looking at it…and thinking about it…and thinking about it…and looking at it!

20131031-104937.jpg

Getting my wood cut!

Tonight I will print the plans out and take them to bed, this is what I will be dreaming about!

A Taxing Task For Mum, Advanced Vegetables!

20131028-150916.jpg

This would have been a fantastically simple exercise…had I not decided to make my own flashcards! The printer and I battled it out for nearly two and a half hours of nap time. Dinner and housework were totally abandoned in my quest to produce these printed vegetable cards.

As you probably know by now I love to make things myself. Ok, I didn’t turn those super cute wooden vegetables by hand on a lathe, but what I wanted, right at that moment, was a handful of flashcards to try out a really simple matching activity.

I made seven different cards, (the radish, card number eight, sadly met a sticky end at the sharp point of my scissors) and left them on his little table to see if he showed any interest…

20131028-150924.jpg

It wasn’t until the following morning that the little guy had a peek at the vegetables sitting in the basket on the table, as he climbed onto his chair I lay just one card in front of him, and picked out the matching vegetable. I then lay down a second card to see if he would reach for anything.

…He grabbed at everything!!!

…It was like a test to see if mummy could retrieve the matching cards fast enough!

20131029-104544.jpg

I think it will be one activity that we will see a progression with. It may be the most complex task that has been presented to him so far, and I hope we enjoy learning and growing this activity.

Sorting objects or toys, be it according to size, colour or category, helps children develop their intellect. Matching and sorting goes one step further to help with problem solving and categorising.

What I find interesting is that the ability to see patterns of any form, is helpful when learning the patterns of language in speaking and writing. Sorting, matching and sequencing are a way for a child to recognise differences and similarities visually, and while my little guy is not ready for words and numbers, these basic vegetable skills may be setting him up to tackle those advanced numeracy and literacy skills later on.

20131029-104552.jpg

There are hundreds of free downloadable templates online, I simply copied and pasted into keynote, four to a page, to match the vegetables we had in our selection. I printed them onto glossy paper and then cut them into individual cards.

Sounds simple! I found it more than a little taxing! You could buy a set of cards, or cut the pictures from magazines of catalogues, or even from an old children’s book from a thrift store. but I liked the fact that I could just use the objects we had already, and print out some matching pictures without having to spend out on anything expensive.

I have totally fallen for these beautiful Michael Olaf fruit and vegetable cards cards though (spotted on howwemontessori) which I may invest in as I see the little guy progress with his matching if he enjoys it.